Hub

The hub is a room added in Chapter 2's Sin Update. Its purpose is to allow the player to travel between the other two floorpaths in the game: the alternate path (from Antibirth/Repentance) and Revelation's path (also the base game's path in case the player is in any of the other two).
The player gets to the hub by simply entering the door that appears after defeating the boss of any floor, which leads to a decorated room with two different trapdoors that take the player to any of the already mentioned paths.
There is also a trapdoor at the beginning of the run in the starting room. It will drop you down into a crawlspace that contains two doors leading to the two alternate floorpaths. The player can then choose which floorpath they would like to travel to for the next floor. (This was made in case the player wants to skip right ahead to the mod's content).
Notes
- The hub will show up on the vanilla floorpath all the way up to Caves 2, which takes the player to Tomb 2 if the Revelations path is chosen. Past Depths 1, the hub will no longer spawn after beating the boss (this is probably because Chapter 3, Vestige, has not been released yet).
- Taking the trapdoor at the beginning of the game will guarantee an extra item drop via a care package in Glacier 1's Treasure Room.
- The trapdoor only allows the player to travel to either Glacier 1 or Downpour 1.
- If the player travels to Glacier 1 after beating the boss of the floor, the extra item will not appear.
- The starting room hub has a built-in ladder allowing the player to exit. Doing so will cause the trapdoor to shut and become inaccessible.
- This will also happen if the player skips the trapdoor and enters any other room.
- The corners of the hub are decorated with statues of different characters from the vanilla game and Revelations, as well as some ornaments in the walls: a cross, a pentagram, a mirror shard, and a knife.
Gallery
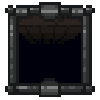
Custom Trapdoor that leads to the Hub.
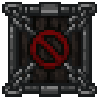
Closed off Trapdoor.

The crawlspace hub when entering the trapdoor.


